Smart Writer – User Guide
Updated March 4, 2026 · Adam Yong
Why We Built Smart Writer
We Heard You: Too Many Options
Let’s be honest – over time, we added a LOT of features to Agility Writer. Advanced Mode, Optimize Mode, Product Roundup writer, Website Page writer, YouTube to Article, and a dozen settings. Each feature solved a real need, but we created a new problem: too many choices.New users would see our menu and think: “Where do I even start? Which mode should I use? What’s the difference?”We heard this feedback constantly:
- “I love the tool, but there are too many options”
- “I just want to write a good article without becoming an expert”
- “Which settings actually matter?”
Our Solution: Best Practices Built In
Smart Writer
3 simple steps
Who Is This For?
- New Users**:** Get started immediately without learning 15 different settings first
- Agencies**:** Produce consistent articles quickly – same quality, less setup time
- Local Businesses**:** Create service pages without needing to understand technical options
- Anyone Who Just Wants to Write**:** Skip the configuration and focus on your content
What About the existing Writing Modes?
Nothing changes for power users. If you prefer Advanced/Optimize Mode and want to tweak every setting manually, it’s still there – exactly as before.Smart Writer is an additional option, not a replacement.
The same writing engine powers everything. Smart Writer just pre-configures the settings that work best.
How Smart Writer Works
| Step | What You Do | Time Required |
|---|---|---|
| 1. Configuration | Enter your topic and select article type | ~30 seconds |
| 2. Outline Review | Review and optionally edit the AI-generated outline | ~1-2 minutes |
| 3. Final Settings | Choose image preferences and confirm cost | ~30 seconds |
Total time to submit: Less than 3 minutes
Getting Started: Dashboard Entry Point
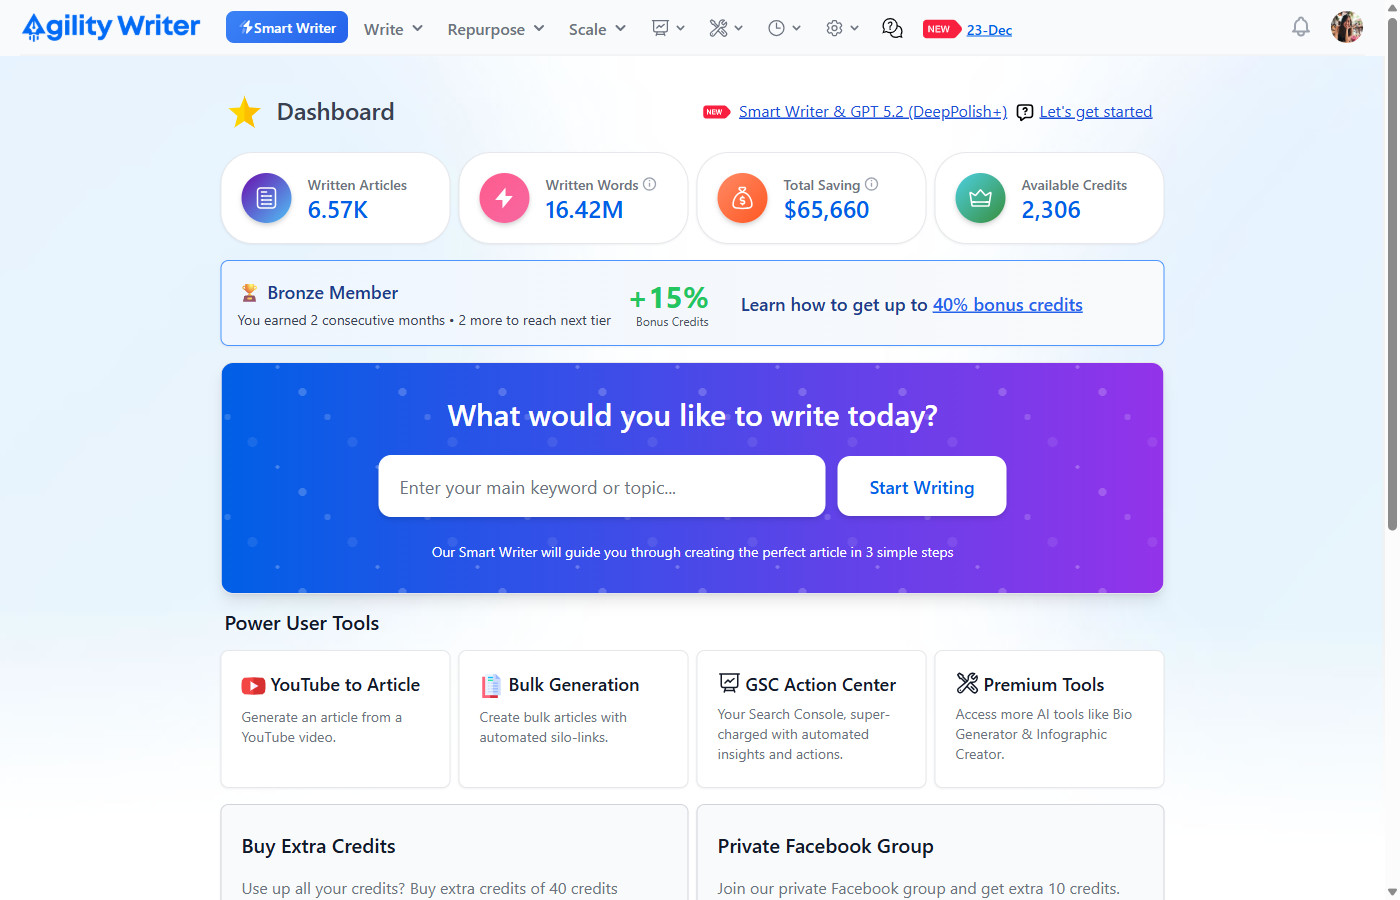
You can access Smart Writer from two places:
- Dashboard Hero Section – The purple banner with “What would you like to write today?” lets you enter your topic and click “Start Writing”
- Navigation Menu – Click the prominent “Smart Writer” button in the top menu
When you enter a topic from the Dashboard and click “Start Writing”, it will pre-fill the Article Title field in Smart Writer.
Step 1: Configuration
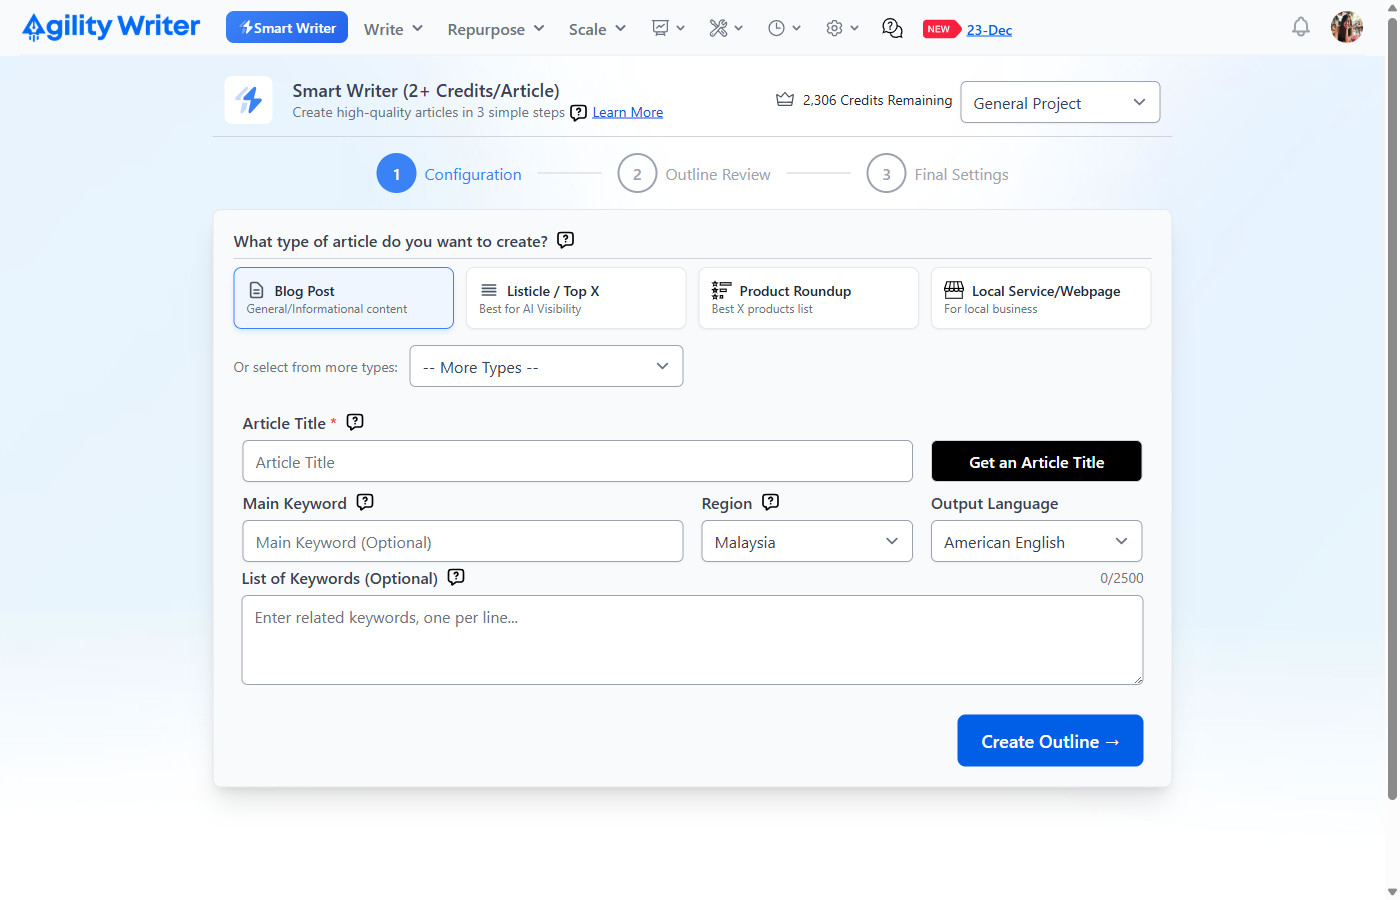
Header SectionAt the top of the page, you’ll see:
- Project Selector – Choose a project to auto-populate settings
- Credits Remaining – Your current credit balance
- Learn More Link – Access help documentation
💡 Pro Tip: Use Projects for One-Click SetupIf you’ve already configured a Project in Settings, simply select it from the dropdown and Smart Writer will automatically populate:
- Region & Language
- Writing Style & Readability
- Point of View
- Business Name & Background (for Local Service articles)
- Negative Terms
This saves significant time when creating multiple articles for the same client or business!
Choosing Your Article Type
The wizard presents 4 main article type cards plus additional options:
| Type | Best For |
|---|---|
| Blog Post | General informational content, how-to guides |
| Listicle / Top X | Improve AI Visibility, “10 X to…” articles |
| Product Roundup | “Best X Products” comparison lists |
| Local Service/Webpage | Local business pages, service descriptions |
Dropdown “More Types”:
- Competitors Alternatives – “X Alternatives” content
- Press Release – Official announcements
- News – Timely news articles
- Single Product Review – In-depth product analysis
- Side-by-Side VS Comparison – “X vs Y”, direct product comparisons
- Glossary – Term definitions and explanations
Step-by-Step: Creating a Blog Post
- Select “Blog Post” by clicking the card (highlighted with blue border when selected)
- Enter Your Article Title
- Type your desired title, or
- Click “Get an Article Title” to get AI-generated SEO-optimized suggestions
- Configure Region & Language
- Region: Select your target country for SERP analysis
- Output Language: Choose your content language (English works best)
- Add Keywords (Optional)
- Enter related keywords, one per line
- Character limit: 2,500 characters
- Counter shows: “0/2500”
- Click “Create Outline” button.
Local Service/Webpage: Business Information
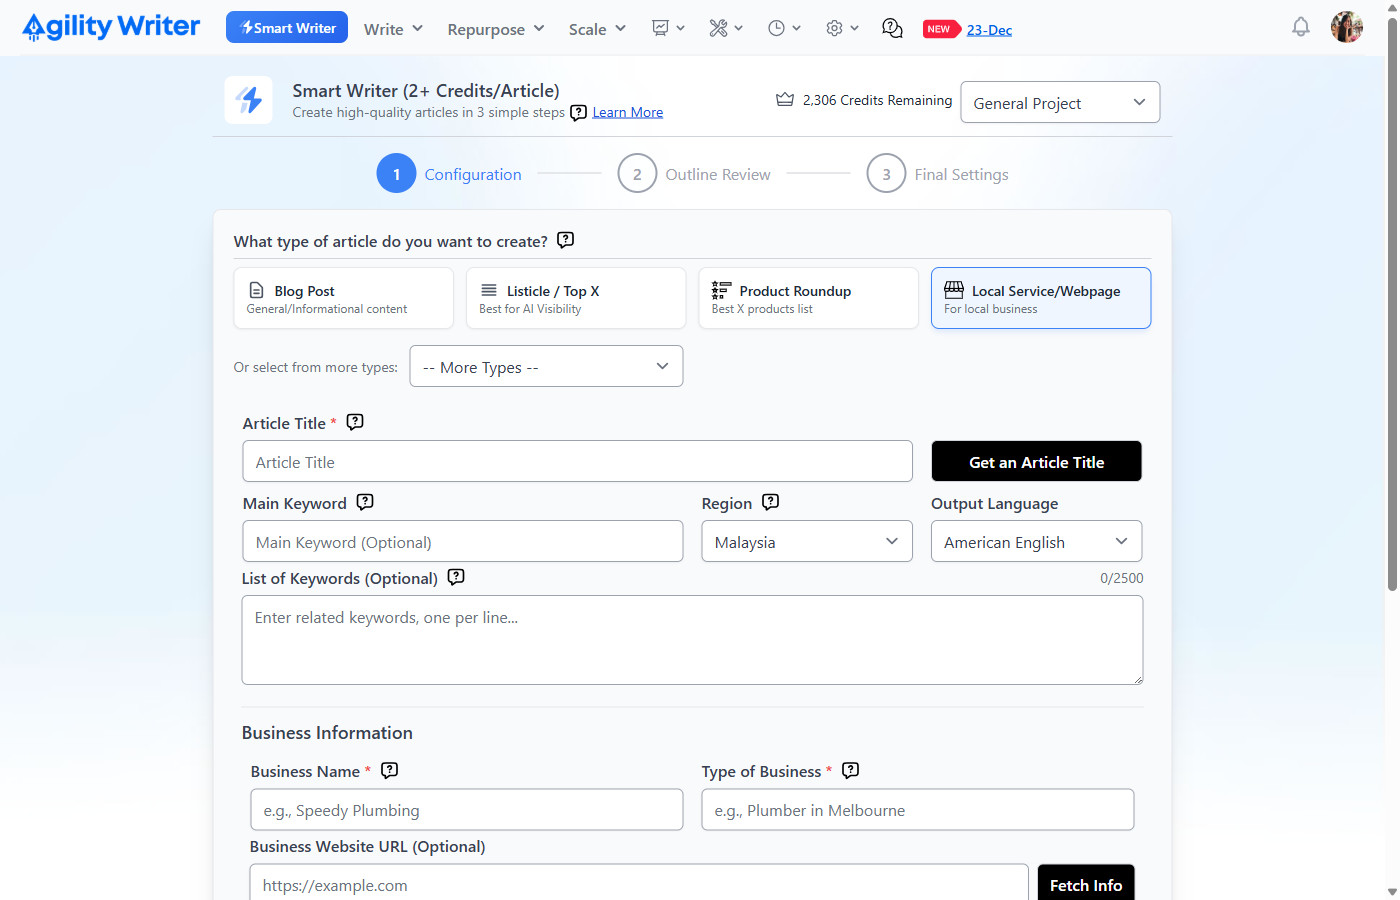
| Field | Required | Example |
|---|---|---|
| Business Name | Yes | “Speedy Plumbing” |
| Type of Business | Yes | “Plumber in Melbourne” |
| Business Website URL | No | https://example.com |
| Business Background | Yes | Services, history, unique selling points |
Pro Tip: Click “Fetch Info” next to the website URL to automatically pull information from your website!
The Business Background field has a 15,000 character limit with a counter.
Loading Screen
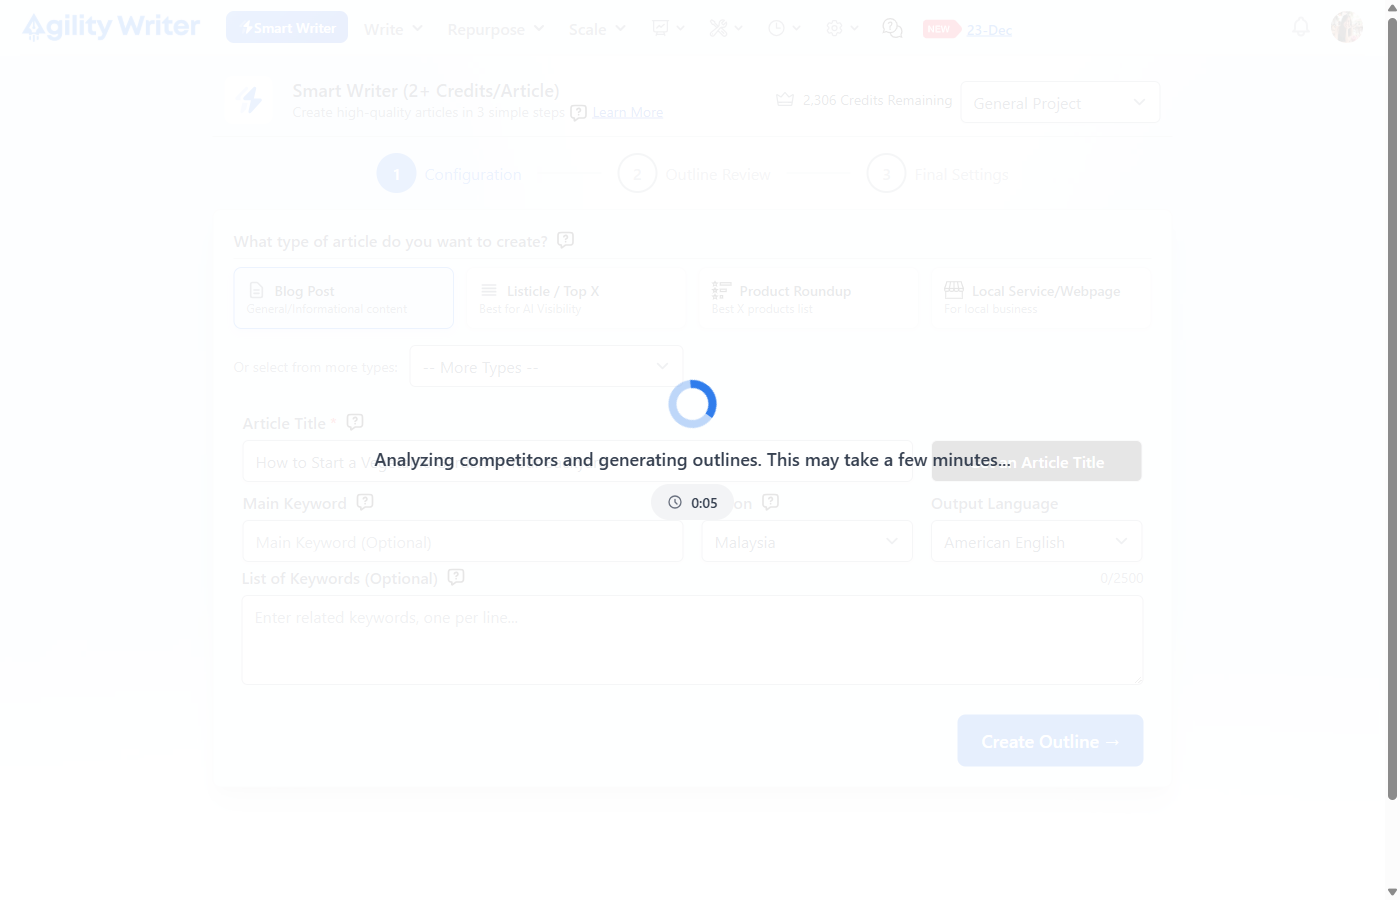
After clicking “Create Outline”, you’ll see:
- A loading spinner
- Message: “Analyzing competitors and generating outlines…”
- Timer display showing elapsed time (typically 30-90 seconds)
The AI is:
- Analyzing top-ranking competitors for your topic
- Identifying content gaps and opportunities
- Generating 3 optimized outline structure
Step 2: Outline Review
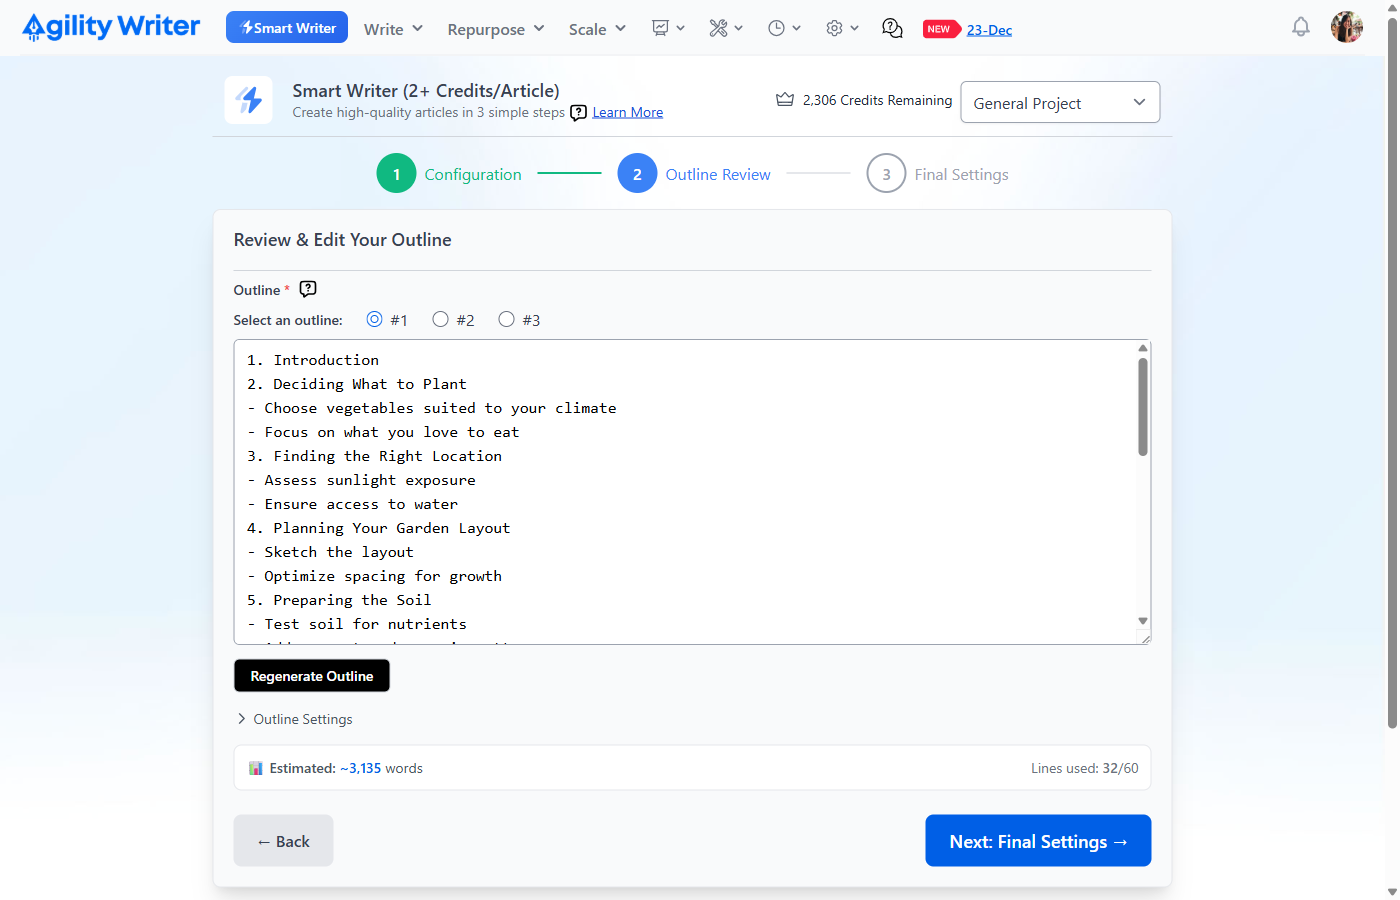
The Outline InterfaceOnce generation completes, you’ll see:
- Progress Indicator – Shows Step 2 (Outline Review) is active
- Outline Label with Help – Click the “?” icon for formatting tips
- Outline Selection Radio Buttons
- #1, #2, #3 – Click to switch between generated options
- Each option has a different structure optimized for your topic
- Outline Editor (Textarea)
- Large editable text area showing the selected outline
- Monospace font for clear structure visualization
- No text wrapping (scroll horizontally for long lines)
- Regenerate Outline Button
- Click if none of the 3 options fit your needs
- Generates 3 fresh outlines
- Word Count Estimate Box
- Shows: “📊 Estimated: ~3,135 words”
- Shows: “Lines used: 32/60”
Outline Format Guide1. Introduction
- Main Heading (H2) – Sub-heading (H3) – Sub-heading (H3) 3. Another Main Heading – Sub-point 4. Main Section … 12. Conclusion
Rules:
- Lines starting with numbers become H2 headings
- Lines starting with – become H3 sub-headings
- Maximum 60 lines recommended
- Always include Introduction and Conclusion
Outline Settings (Expandable Section)
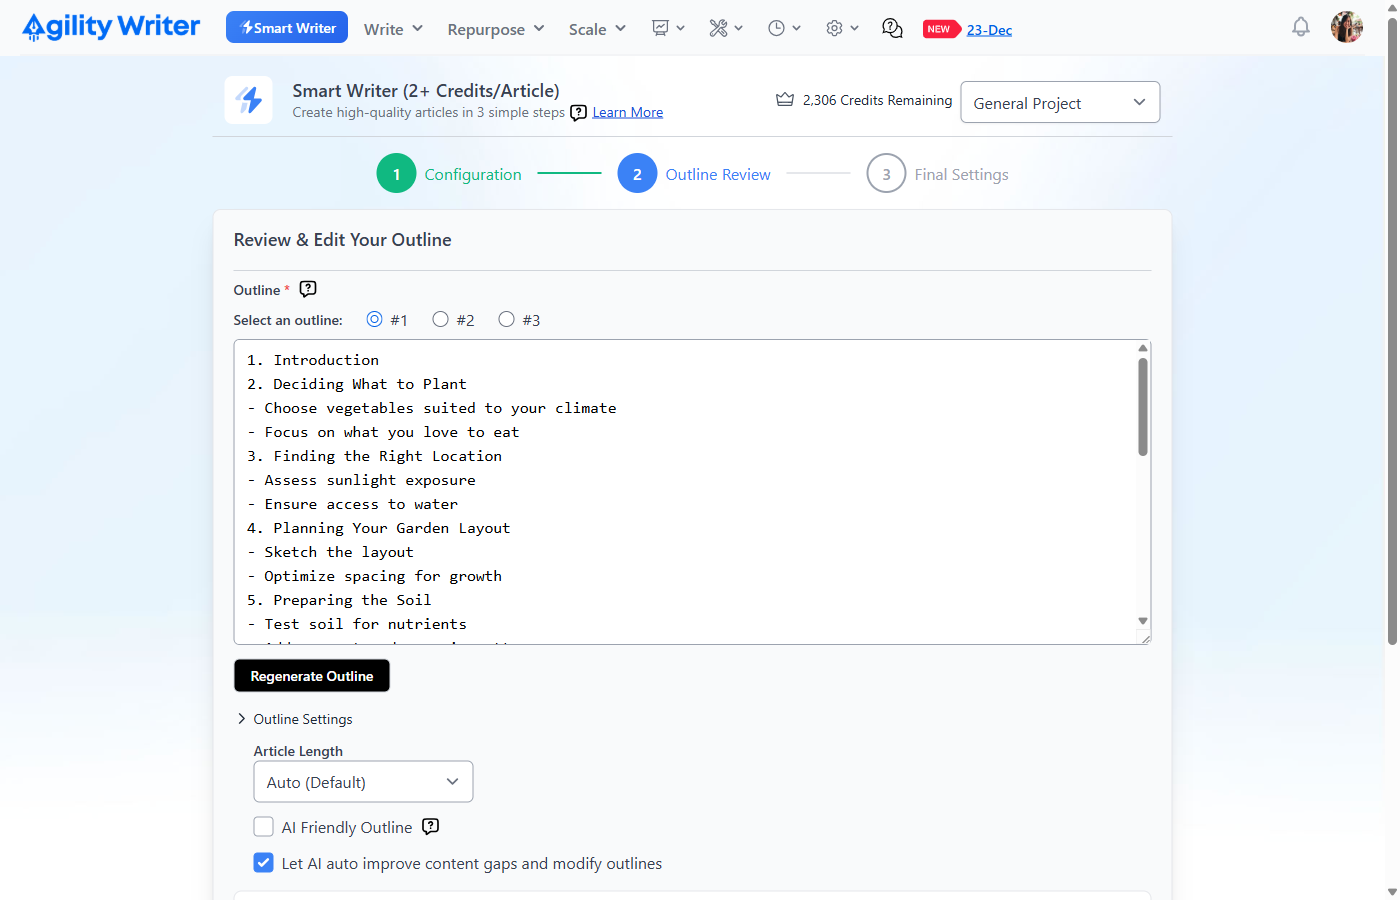
| Setting | Options | Default | Purpose |
|---|---|---|---|
| Article Length | Auto, Auto – More H2, 750-5,000+ words | Auto | Control output length |
| AI Friendly Outline | Checkbox | Off | Off Optimize for LLM/AI visibility |
| Let AI auto improve content gaps | Checkbox | On | Allow AI to enhance outline |
Note: When “Let AI auto improve” is checked, the AI Model defaults to GPT-5.2 (DeepPolish+) in Step 3.
Navigation
- ← Back – Return to Step 1 to modify configuration
- Next: Final Settings → – Proceed to Step 3
Step 3: Final Settings
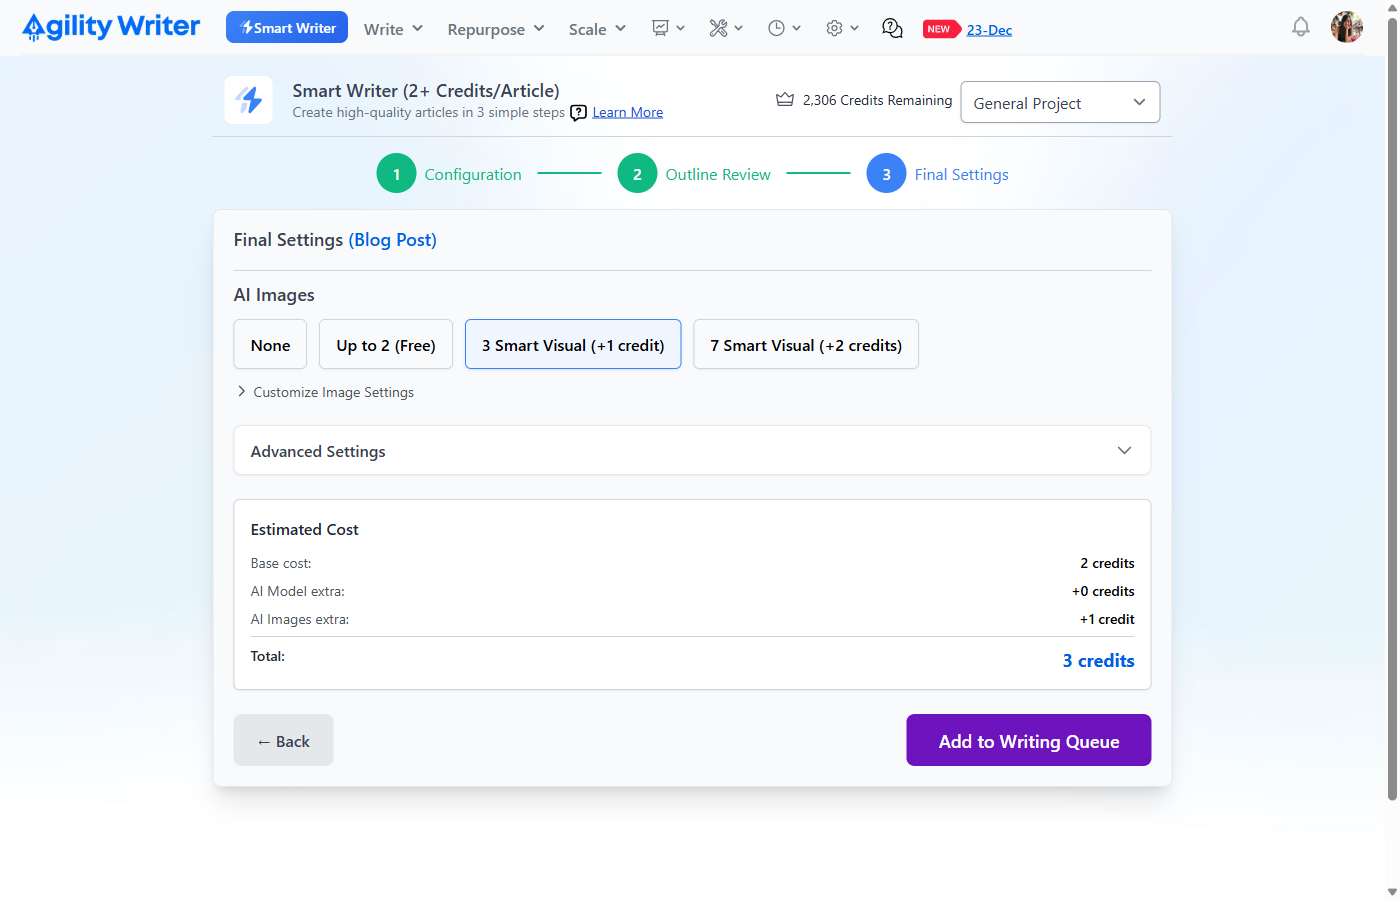
Header DisplayThe heading shows: “Final Settings (Blog Post)” – confirming your selected article type.
AI Images SelectionChoose your image preference from 4 options:
| Option | Cost | Images | Quality |
|---|---|---|---|
| None | Free | Dolor | – |
| Up to 2 (Free) | Free | 2 | Standard |
| 3 Smart Visual | + 1 credit | 3 | Premium |
| 7 Smart Visual | + 2 credits | 7 | Premium |
Image Customization (Expandable)
| Setting | Option | Default |
|---|---|---|
| Image Style | Photo, Photo (Raw), Cinematic, Creative Photo, Anime, Comic Book, Flat Design | Photo |
| Size | Landscape 16:9, Landscape 3:2, Portrait 9:16, Square… | Landscape 3:2 |
| Alt Tag | None, Short, Long, Short + Keyword, Long + Keyword | Short |
| Ethnicity | Any, Black, Caucasian, East Asian, South Asian, Hispanic | Any |
| Reference Images | Up to 3 images | None |
Advanced Settings (Expandable)
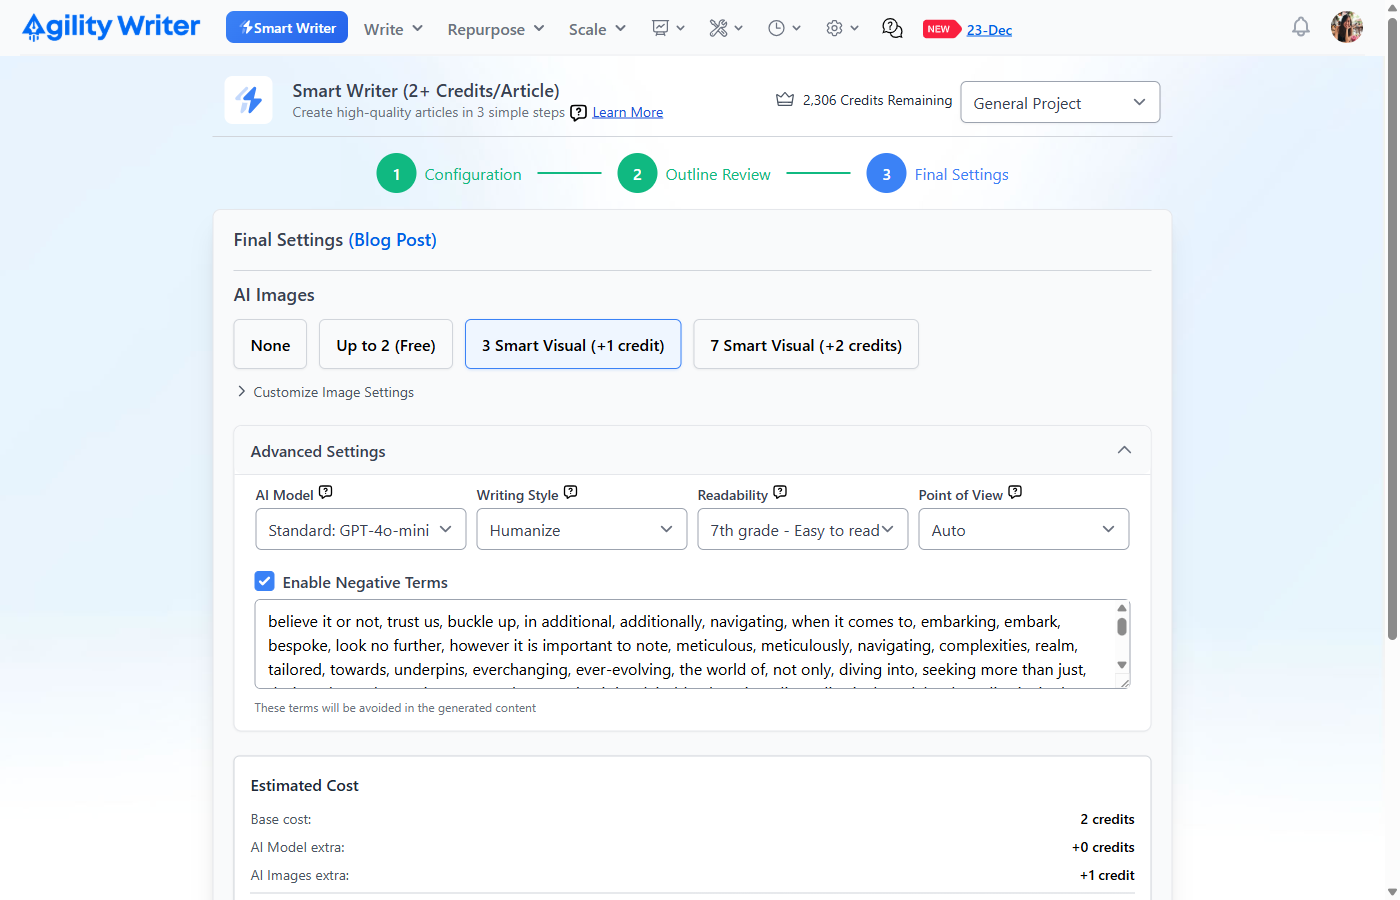
| Settings | Options | Default |
|---|---|---|
| AI Model | Standard: GPT-4o-mini, ⭐ GPT-5.2 (DeepPolish+), ⭐ Gemini 3.0 Pro | Depends on article type |
| Writing Style | Default, Auto from SERP, Authoritative + Conversational, Humanize, Health, Local Biz, News, SEO, Narrative | Depends on article type |
| Readability | 5th-16th+ grade levels | 7th grade |
| Point of View | Auto, First Person (I/We), Second Person, Third Person | Auto |
| Negative Terms | Checkbox + text area | Enabled with defaults |
Why These Defaults? These aren’t random choices. GPT-5.2 with DeepPolish+ produces the most polished output. “Humanize” writing style reduces AI-sounding patterns. 7th grade readability ensures broad accessibility. These settings consistently produce high-performing articles.
Estimated Cost BoxThe “Estimated Cost Box” provides a clear breakdown of the total cost in credits, starting with a Base cost of 2 credits, adding 0 extra credits for the AI Model and 1 extra credit for AI Images, resulting in a Total cost of 3 credits.
Submit Your ArticleClick “Add to Writing Queue” (green button) to submit.
Success: A modal appears with options:
- Write Another – Start a new article
- View Queue – Go to History to monitor progress
Special Article Types
Product Roundup & Competitors AlternativesThese types require product validation:
- Product List Section appears in Step 2 Enter products in format: Product Name | https://product-url.com Another Product | Auto
- Counter shows: “Added products: 3/15”
- Click “Validate Products” before proceeding
- Fixed AI Model: Full GPT 4-o (cannot change)
- Base Cost: 4 credits
Press Release & NewsSimplified workflow:
- No outline generation (textarea disabled with message)
- No Outline Settings section
- No word count estimate
- Fixed AI Model: Claude 4 Sonnet
- Images: Only “None” and “Up to 2 (Free)” options
- Base Cost: 1 credit
- Next button: Always enabled (no outline validation)
Tips for Best Results
Before You Start
- Set Up Projects First: Go to Settings → Projects and configure your business info, preferred region, language, and writing style. When you select this project in Smart Writer, all settings auto-populate instantly.
- Research Your Topic: Have a clear angle before starting
- Know Your Audience: Consider who will read your content
During Configuration
- Be Specific with Titles:
- ✅ “How to Choose the Right Coffee Machine for Your Kitchen”
- ❌ “Coffee Machines”
- Use Keywords Strategically: Add terms you want the AI to incorporate
- Match Article Type to Goal: Each type has optimized defaults
During Outline Review
- Review All 3 Options: Often #2 or #3 has better structure
- Edit Sparingly: AI structure is based on competitor analysis
- Add Unique Angles: Insert headings competitors missed
Final Settings
- Trust the Defaults: Based on thousands of successful articles
- Use Reference Images: For brand consistency
- Verify Credits: Check balance before submitting
Frequently Asked Questions
**Q: How long does outline generation take?**A: Usually 30-90 seconds. The timer shows elapsed time during loading.
Q: Can I edit the article after generation?A: Yes! All articles are fully editable in the History section.
**Q: What if I need more control?**A: Use Advanced Mode (Write menu → Advanced Mode) for 50+ customization options.
**Q: Why does Product Roundup cost more?**A: These articles require additional product research and comparison structure.
**Q: Can I use any language?**A: English variants work best. Other languages are in beta.
**Q: What’s the difference between Smart Writer and Advanced Mode?**A: Same writing engine, different approach. Smart Writer pre-configures settings based on what works best, you make 2-3 decisions. Advanced Mode shows you everything and lets you customize 30+ parameters. Choose based on how much control you want.
**Q: How do I get AI title suggestions?**A: Click “Get an Article Title” – it analyzes SERP data for SEO-optimized suggestions.
**Q: Will my settings be saved?**A: Yes! Region, language, and preferences persist across sessions.
Still need help?
Browse the full help center or start writing on a $1 trial.