1-Click Mode
Updated March 4, 2026 · Adam Yong
The 1-Click mode allows you to write an article fast based on the top-ranking search results with a single click. This feature is best for writing generic topics and typically generates 1500++ words.
Step 1. Setting up your article
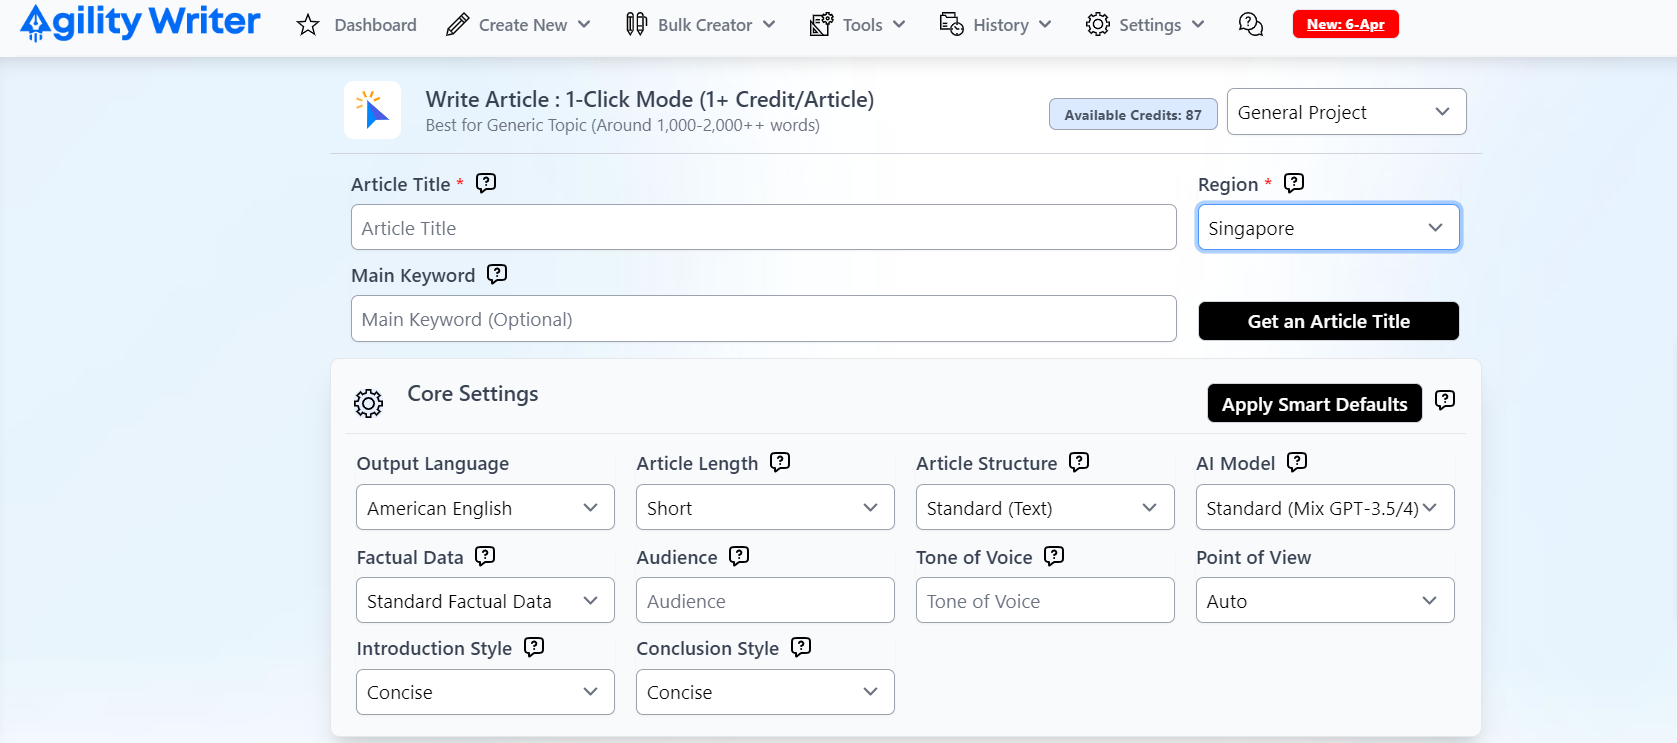
- If you already have an article title, you may use it here.
- If you do not have a specific title, use the GET AN ARTICLE feature with your target keyword and region. It will analyze data to give you the best article title match.
Step 2. Core settings
With your title and target audience set, it’s time to prepare search-engine-friendly content. Here are the key features you should not miss:
Output Language
1-Click Mode offers more than 15 output language options including Non-English such as Malay, Japanese, and Chinese.
Article Length
Short Articles = 500-1500 words
Standard Articles = 1000-3000 words
Long Articles = More than 2000 words
The actual word count will still depend on your chosen topic. For better control of the word count, you may use the Advance Mode.
Article Structure
For more diverse-looking content with a mix of text, quote, bullets, and tables.
- Advanced (Standard) – The system will decide the article’s length and format (text, long text, quote, bullet list, and maximum of 3 tables)
- Advanced (Detailed): Recommended for articles heavy on statistics and data. Otherwise, an Advanced (Standard) setting will do.
- Standard Text: All-text output, recommended for simple, personal blog posts.
- Long-text: For that highly informative, authoritative article.
AI Model
1-Click Mode is automatically set to Standard Mix GPT 3.5/4. If you want to choose another model, use the Advanced Mode feature.
Factual Data
This gives you the option to select your credible data sources or simply let the AI search from the top sources.
- Standard Factual Data – Crawl once live factual data for the entire article. Choosing Factual Data or Standard Factual data will not affect your needed credits.
Audience – Specify the group of people you want to talk to with your article. Examples: Homeowners, students, business owners, etc.
Tone of Voice – Let the system know the writing style or tone here. Example: professional, informal, educational, etc.
Point of View -Set the author’s point of view here.
Introduction Style
Choose from four introduction styles:
- Concise – write a short and concise introduction
- Engaging – write an interesting and more extended intro
- Authoritative (Authorship) – Engaging intro with author’s expertise to build credibility. Make sure to include Author’s background in the project settings
- Comprehensive Insight – Provides an in-depth understanding of the topic incorporating various perspectives.
Conclusion Style
Choose between a Concise, Engaging, or Expert Opinion conclusion for your article.
- Concise – write a short and concise conclusion
- Engaging – write an interesting and more extended conclusion
- Expert Opinion – conclude your article with a unique perspective from a fictional expert.
Step 3: Advanced Settings
This is for your added SEO needs, although majority of the setting options can be already addressed in your core settings. Below are some of the options that you may find helpful:
1. Key Takeaways
Tick this option if you want to include quick summaries of your article.
2. FAQs, Meta Description, and Title
Need to use more keywords? Maximize your keywords by using them in your FAQs and meta description.
3. Image Prompts
Add image prompts for AI Images Creator.
4. YouTube Videos
Will automatically add YouTube videos in your first three headings (H2)
5. Add Styling
This will add bold style on important terms across the articles.
6. Improve Readability
You can do this early on in your core settings by choosing In-Depth Factual Data or Custom Factual Data. This may also reduce word count of your article output.
7. Authority Links
Auto-add up to 5 outbound authority links to high-domain authority links as part of the SEO optimization.
8. Change H3 to Bold
This is an easy way to create a neat article that does not have too many heading tags but still retains the outline you prepared.
9. Disabling Transition
If you tick this, our system will not generate transition sentences in between headings.
10. Exclude Quotes
Avoid including quotes in the article. By default, the system will automatically insert quotes with the Advanced article structure.
11. First-Hand Experience
Incorporate personal insights and experience at various points in the article to enhance its Experience, Expertise, Authoritativeness, and Trustworthiness (E-E-A-T). First-person point of view and Full GPT-4 will generate the best results.
Step 4: Image Settings
Generated images will be hugely based on the content of your H2 and H3. You can check this link for more information on generating AI images.
Step 5: Publishing Settings
Select a site where you want to auto-publish your article to once it is completed. You may check the WordPress publishing Guide for more information.
Step 6: Add to Writing Queue
Click the “Add to Writing Queue” button to begin generating your article. The process may take between 10 to 20 minutes, depending on your specifications.
You have reached the end of the 1-Click Mode! All that’s left to do now is to sit and wait for your article to be generated.
Still need help?
Browse the full help center or start writing on a $1 trial.